|
|
Verified: Download Trend Micro Diagnostic Toolkit| Problem | Toolkit Solution | Time | | :--- | :--- | :--- | | | Use Troubleshooter → "Repair Driver Signatures" → Reboot. | 3 min | | Virus definitions stuck at 0% | Diagnostic Scan → Check for proxy/VPN conflicts → "Fix Update Pipeline." | 2 min | | Unable to uninstall Trend Micro (missing MSI file) | Cleanup Tools → Force Removal Tool. | 4 min | Part 6: Frequently Asked Questions (FAQ) Q1: Is the Trend Micro Diagnostic Toolkit free? A: Yes, 100% free. Trend Micro provides it to all users—even those on a trial version. You do not need an active subscription to download or run diagnostics, though repairs may require a valid license. Q2: Why does my antivirus flag the toolkit as a risk? A: Some third-party AVs (like Windows Defender, ironically) temporarily flag TMDiagToolkit.exe as "potentially unwanted" because it uninstalls security products. This is a false positive. As long as you have the verified digital signature, add it to your exclusions list. Q3: Can I use this toolkit on Mac or Android? A: No. The Diagnostic Toolkit is Windows-only. For Mac, Trend Micro offers a separate "Removal Tool" (not the Diagnostic Toolkit). Do not try to run the .exe on a Mac using Wine—it will cause kernel panics. Q4: How often is the toolkit updated? A: Trend Micro updates the toolkit approximately once per quarter (January, April, July, October). Always re-download the verified version before a major repair to ensure compatibility with the latest Windows updates. Q5: I clicked "Download" but nothing happens. A: Clear your browser cache. Alternatively, use curl or wget from Command Prompt (admin): curl -O https://files.trendmicro.com/products/tsc/diag/TMDiagToolkit.exe Then verify the signature manually. Part 7: Verified vs. "Cracked" or "Portable" Versions You may see websites offering a "portable" or "cracked" version of the Diagnostic Toolkit that claims to unlock "Pro features." This is a scam. Bookmark this page or the official Trend Micro download URL. Do not rely on search engines for critical security tools—they are too easy to poison with fake ads. Have you successfully used the verified Trend Micro Diagnostic Toolkit to solve an error? Share your experience in the comments below, or contact Trend Micro Support directly via the help center. In the help center search bar, type exactly: Diagnostic Toolkit or TMDiag . download trend micro diagnostic toolkit verified Alternatively, go to https://www.trendmicro.com → Click “Support” → Select “Consumer” or “Business” → Choose “Download Center.” The toolkit is not listed with the main product downloads. Use one of these two methods: In this guide, we will walk you through exactly how to , why you need the official version, and how to use it to fix nearly any Trend Micro product issue. Part 1: What is the Trend Micro Diagnostic Toolkit? Before we discuss the download process, it is essential to understand what this toolkit actually is. Despite what some third-party sites claim, the Diagnostic Toolkit is not a general cleaning tool or a replacement for your main antivirus. | Problem | Toolkit Solution | Time | | Risk | Consequence | | :--- | :--- | | | Using a toolkit from 2021 on a 2025 Trend Micro build will produce false errors or fail to run. | | Bundled Adware | Third-party repackagers often wrap the toolkit in an installer that adds browser hijackers. | | Trojan Disguise | Hackers rename malware as TMDiagToolkit.exe . Without a digital signature check, you could install a keylogger. | | Missing Dependencies | Verified downloads include necessary runtime files (Visual C++ Redistributables). Unverified copies crash immediately. | In the world of cybersecurity, few things are as frustrating as a security tool malfunctioning. Your antivirus is supposed to protect you, but what happens when the protector itself crashes, refuses to update, or blocks a critical application? You enter a loop of error messages with no clear solution. A: Yes, 100% free Published by: Security Help Desk | Updated: May 2026 |
Verified: Download Trend Micro Diagnostic ToolkitSince different computers have different configurations, some old model computer may install the games slowly. Here is a tip which make your computer speed up in installing the PS2 games:
*NOTE* USB Extreme Win32 utility (Windows GUI) - Allows easy installation from your CD/DVD drive to your USB HDD USBInsane (Windows GUI) - Allows you to install an ISO stored on the PC HDD as well as the CD/DVD drive. USBeXtreme (DOS) - The setup program containing the format and install software The DOS version is more stable and has a higher success rate for proper installations, but is not as simple as the GUI version. So we will guide you thru the DOS version. USBeXtreme User Manual(MS-DOS mode) Before Starting: To use the USBeXtreme on your PS2, you will need a USB Hard drive Enclosure with Hard drive installed (both devices are sold separately), either 3.5' or 2.5' USB Hard drive Enclosure with Hard drive can be use. *For the installation of a Hard Drive into your USB enclosure, please refer to the user manual of the USB Enclosure if its the removable type. Hard Drive preparation If you are using a new
hard drive, you will need to initialize the hard drive with Windows
2000/XP.(For Windows 98/ME
user, you will need other Disk Management software, like, Partition
Magic to initialize and format the harddisk) To initialize the
hard drive, connect the hard drive enclosure to your PC's USB port and install the
driver if its
required, then go to Start
and right
click My Computer >
Manage
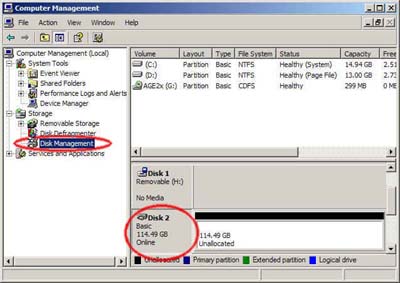
> Disk Management. * For the driver installation, please refer to the user manual of the hard drive enclosure* After that you will able to view all drives installed in your PC, select the newly installed hard drive, right click and choose "initialize", follow the on screen instruction and the hard drive will be initialized by your PC and assign a driver letter to it. You can format the drive by using NTFS format in order to use up the maximum space of the hard drive. Create a Primary Partition of the max space available.
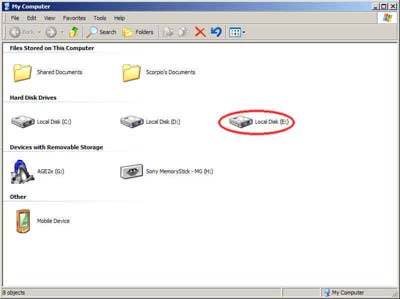
If the hard drive has formatted and assigned a drive letter successfully, you will see a new drive in "My Computer"
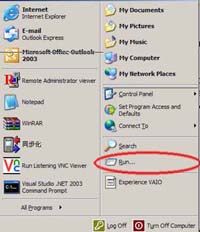
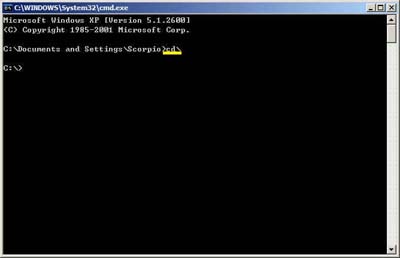
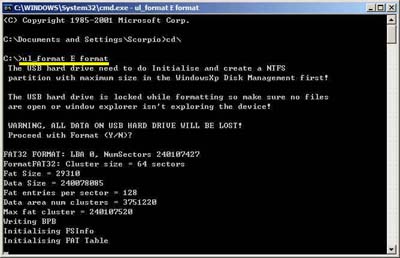
Formatting for USBeXtreme Download the DOS software of USBeXtreme from the link above, unzip the file and run the USBeXtreme_setup.exe file, then the tools will be extracted into the drive C. Please DO NOT change the default installation path except you are familiar with MS-DOS command. After extracted the USBeXtreme Client software, go to "Start" then "Run", Enter "Command" or "CMD" to open a command prompt. Change the directory to the root directory C drive by entering command cd\ and press enter, you will see C:\> appear on the command line. You can refer to the following picture.
Then you can enter the following command. ul_format X format "X" is the drive letter of your USB hard drive.
The format action will take a
few minutes, it is depends on the capacity of the partition you
created, please DO NOT remove the hard drive or power off the USB
harddisk enclosure during this period.
Game Converting To convert games from CD/DVD drive to the USB hard drive, please connect the USB drive to your PC, then go to command prompt "Start" > "Run" > enter Command or CMD, change the directory to the root directory C drive by entering command cd\ and press enter, you will see C:\> appear on the command line. You can refer to the following picture.
This is the DOS command required to install. [color coded for easy understanding] ul_install SourceDrive TargetDrive GameName Disc e.g. if your DVD/CD-Rom drive is drive D, and the USB harddisk is E, and you are converting a PS2 DVD game "Metal Gear Solid", the command will be the following ul_install D E MetalGearSolid DVD you can refer to the following picture 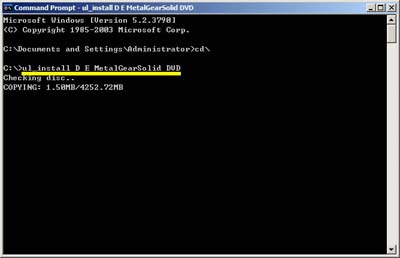
Game converting will take a
few minutes depending on the game disc size.
Game Playing Connect and power on the USB
harddisk to your PS2 and boot your PS2 with USBeXtreme, when you see
the game selection menu, select the game and press X on the joypad, the
game will then run immediately.
|
|
|